The new XAF Blazor UI has all the community going crazy and doing all sort of cool projects. If you have read the XAF Blazor FAQ you know that:
“The wizard does not currently support the capability to add Blazor UI projects to existing XAF applications. To re-use your existing business model, platform-independent controllers and Application Model settings, attach your platform-independent modules to a new Blazor application (Add a Module in Code). Modules should be converted to .NET Standard 2.0. See the following article: How to port an XAF platform-agnostic module to .NET Standard 2.0+.”
There has been a lot of interest in this topic so we decided to create a quick video about having your XAF Win, Web and Blazor in the same solution.
You can see the video here: https://www.youtube.com/watch?v=g5xvMPm0LJI&t=
Now, let’s create a custom template that contains all platform XAF offer us.
Step 1 – .template.config
We need to create a folder called .template.config in the root of the solution directory.
Step 2 – template.json
Inside the new created folder we need to add a file called template.json that looks like this:
As you can see in this link our template will be called by its shortname “xafall” and the sourcename it is for replacing with your own project name.
Step 3 – Install the template
As simple as dotnet new –install ~path to the root directory of the template solution.
In our case:
The new template is installed and ready to use.
Now,
And Boom:
Pretty neat right?
We now could create a nuget package for our template and have it available for the community. If you want to learn more about custom template, I would highly encourage you to check this Channel 9 Series: https://channel9.msdn.com/Shows/Visual-Studio-Toolbox/Use-an-Existing-NET-Core-Project-Template
Source code: https://github.com/jjcolumb/XAFUnifiedProject
Bonus:
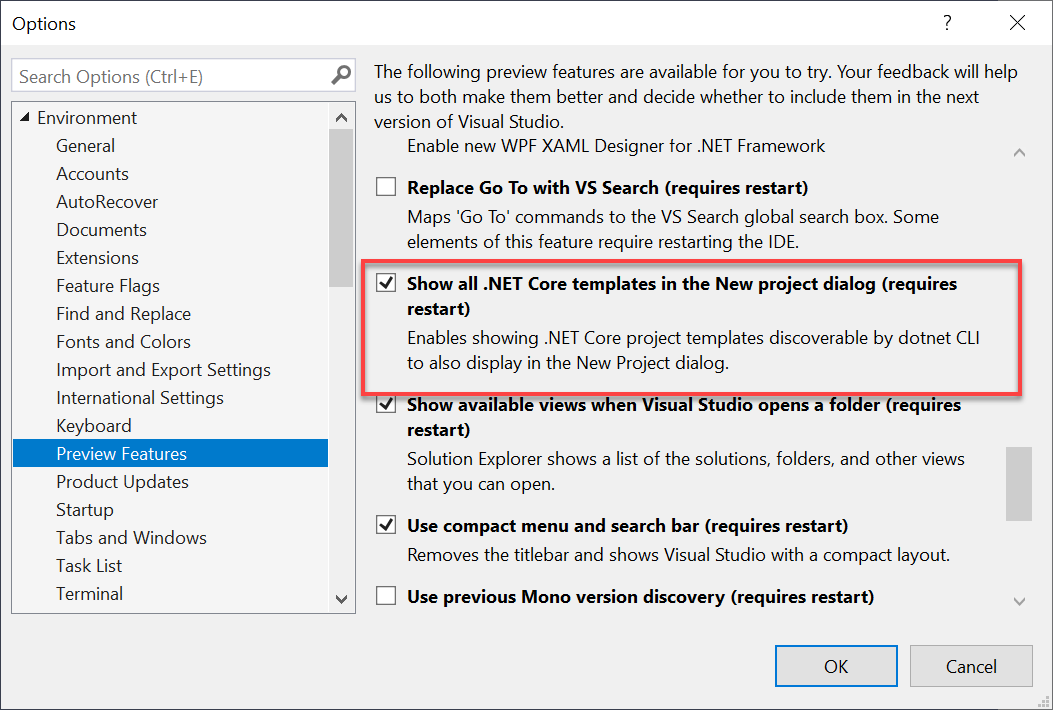
Want to see your template in a GUI and not use the CLI?
In Visual Studio under Preview Features check the following checkbox:
Until next time. XAF out!


